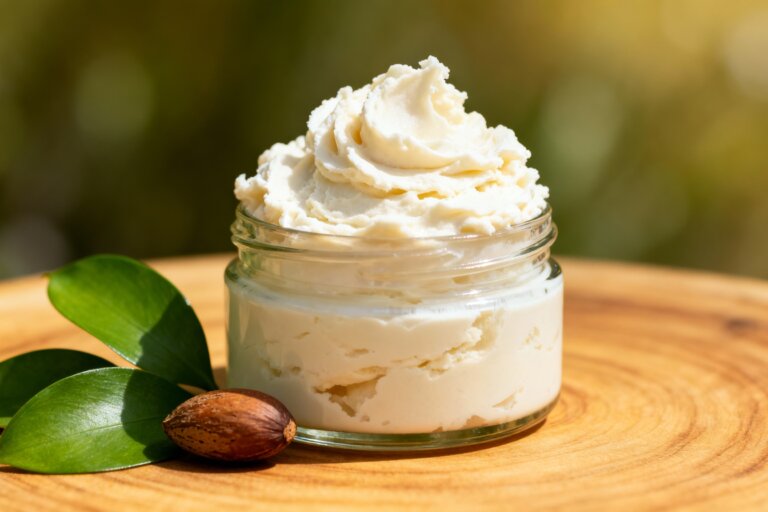
DIY Whipped Shea Butter Body Butter for Deeply Moisturized, Glowing Skin – Simple, Luxurious, and Affordable
Skip the store-bought creams and make a rich, creamy body butter right at home. This whipped shea butter sinks into dry skin, leaves a soft glow, and smells incredible with your favorite essential oils. It’s affordable, customizable, and comes together with just a few pantry-friendly ingredients.
You’ll get a fluffy, cloud-like texture that feels indulgent without being greasy. Perfect for dry elbows, winter skin, or a nighttime moisture boost.
Why This Recipe Works
This simple blend balances deeply nourishing butters with lightweight carrier oils for a smooth, whipped texture. Shea butter provides long-lasting moisture, while oils like sweet almond or jojoba help it spread easily.
A touch of arrowroot powder cuts greasiness without drying. Whipping adds air, making it fluffy and quick to absorb. The result is a body butter that feels luxurious and leaves a healthy, soft glow.
Shopping List
- Unrefined shea butter (1 cup / ~200 g)
- Coconut oil or cocoa butter (2 tbsp) for firmness
- Sweet almond oil, jojoba oil, or grapeseed oil (1/3 cup)
- Arrowroot powder or cornstarch (1–2 tsp)
- Vitamin E oil (optional, 1/2 tsp) for antioxidant support
- Essential oils (optional, 15–25 drops total)
- Clean glass jars with lids
- Mixing bowl, spatula, and hand mixer or stand mixer
- Double boiler (or heat-safe bowl over a pot of simmering water)
Step-by-Step Instructions
- Melt the solids. Add shea butter and coconut oil (or cocoa butter) to a double boiler.
Warm gently until just melted, stirring occasionally. Avoid overheating to preserve nutrients.
- Add liquid oils. Remove from heat and stir in sweet almond, jojoba, or grapeseed oil. Mix until uniform.
- Cool the mixture. Place the bowl in the fridge for 20–30 minutes until the edges look opaque and the mixture thickens like soft set custard.
You want it cool, not fully solid.
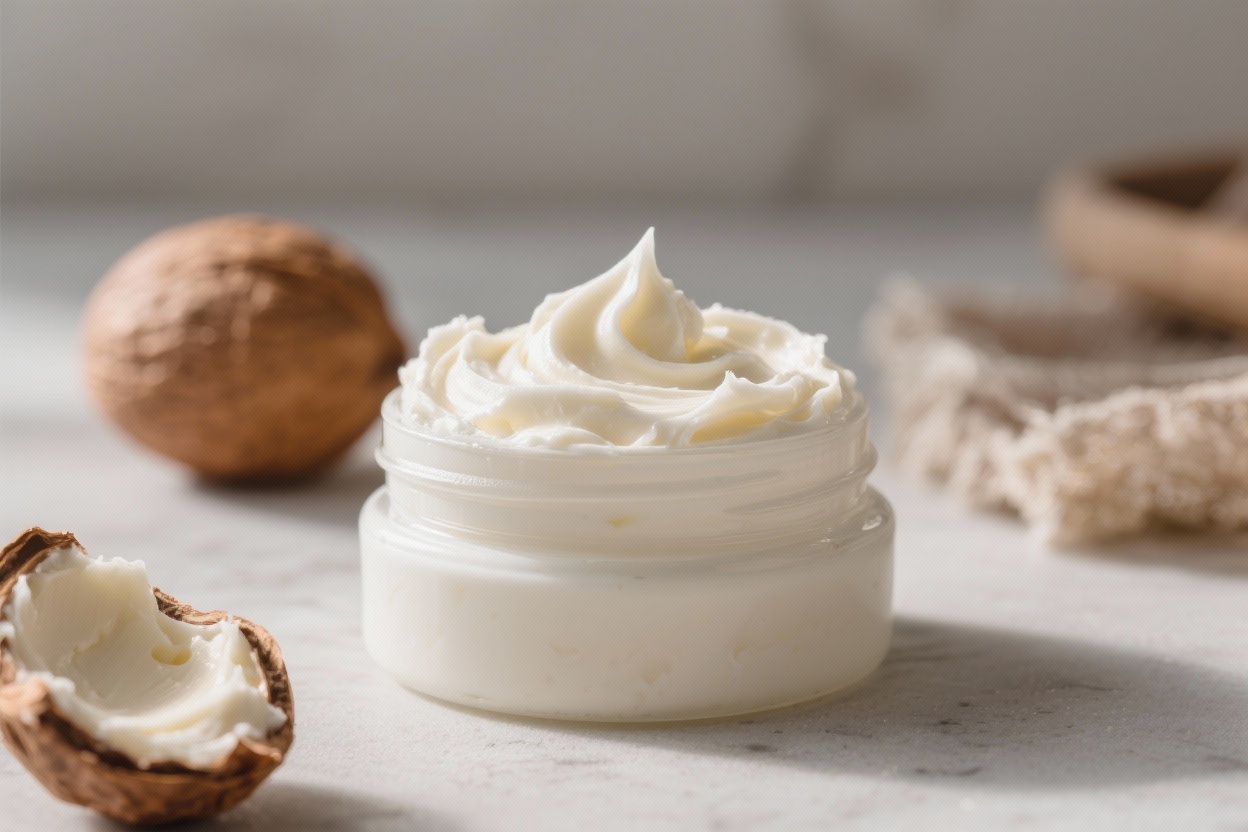
- Whip it. Using a hand mixer, whip on medium-high for 3–5 minutes until light and fluffy. Scrape the bowl as you go to keep the texture even.
- Finish and flavor. Sprinkle in arrowroot powder (start with 1 tsp), whip again, and add more if needed to reduce greasiness. Mix in vitamin E and essential oils.
Whip another 30–60 seconds.
- Jar it up. Spoon into clean, dry jars. Label with the date and scent.
- Let it set. Leave at room temperature for a few hours to stabilize the whipped texture before using.
Keeping It Fresh
- Store in a cool, dry place away from direct sunlight. Heat may soften the whip.
- Use clean, dry hands or a cosmetic spatula to avoid introducing water and bacteria.
- Shelf life: Typically 6–9 months.
If it smells off or changes color dramatically, discard.
- No water, no preservative needed. Since this recipe is oil-based, a preservative isn’t required. Keep water out to prevent spoilage.
Benefits of This Recipe
- Deep hydration: Shea butter locks in moisture and softens rough patches.
- Gentle and customizable: Choose unscented or skin-friendly essential oils.
- Non-greasy finish: Arrowroot helps your skin feel velvety, not oily.
- Cost-effective luxury: A little goes a long way, and you control the ingredients.
- Year-round friendly: Adjust oils for warmer or cooler seasons.
Pitfalls to Watch Out For
- Overheating the butters: High heat can make the final texture grainy and reduce skin-loving nutrients.
- Skipping the cool-down: Whipping too warm yields a runny butter that won’t hold its shape.
- Adding water-based ingredients: This can lead to spoilage without a preservative.
- Too much essential oil: Can irritate skin. Keep total dilution around 1% for body use.
- Wrong climate balance: In hot weather, use more cocoa butter; in cold weather, keep it richer with shea.
Variations You Can Try
- Silky summer whip: Swap in 1–2 tbsp jojoba for a lighter feel and add 2 tsp arrowroot.
- Ultra-rich winter butter: Use cocoa butter instead of coconut oil and reduce arrowroot slightly.
- Lavender vanilla: 15 drops lavender + 5 drops vanilla oleoresin (or benzoin) for a cozy scent.
- Uplifting citrus: 10 drops sweet orange + 5 drops grapefruit + 5 drops bergamot FCF.
Use sun-safe versions.
- Unscented sensitive skin: Skip essential oils and keep it simple with shea + jojoba + vitamin E.
FAQ
Can I use refined shea butter?
Yes. Refined shea has less scent and a lighter color. Unrefined retains more natural nutrients, but both work well for texture and moisture.
What’s the best way to avoid grainy texture?
Melt gently, cool quickly, and whip once the mixture is opaque and thickened.
Avoid reheating. If it becomes grainy later, gently remelt, cool, and rewhip.
Is this safe for the face?
It can be heavy for facial skin and may clog pores for some. If you try it, use a tiny amount and patch test.
For faces, lighter oils like squalane are often better.
How much essential oil should I use?
Keep it around 1% dilution for body use. That’s roughly 20 drops per 100 g of product. Always patch test and avoid phototoxic oils unless labeled FCF or sun-safe.
Can I add aloe gel or rose water?
No, not without an emulsifier and preservative.
This is an anhydrous (oil-only) recipe. Water-based ingredients require a different formula.
What if my body butter melts in summer?
Add more cocoa butter for firmness or store in a cooler spot. Even if it loses its whip, it still works; just rewhip after chilling if you want the fluff back.
Wrapping Up
This whipped shea butter is simple, budget-friendly, and incredibly effective.
With a few ingredients and a mixer, you’ll create a plush, buttery moisturizer that leaves skin soft and glowing. Customize the scent, tweak the texture for your climate, and enjoy a luxe daily ritual that feels good and works hard.
Printable Recipe Card
Want just the essential recipe details without scrolling through the article? Get our printable recipe card with just the ingredients and instructions.